Zoom Audio Settings
updated 11/09/2021
Intro
I have updated the instructions outlined in this excellent article by Katie Wardrobe. Follow them to optimize Zoom for use with live music making, i.e. singing or live instruments on a desktop computer or laptop.
Note these instructions are for the Zoom desktop client when used on a laptop or desktop computer. Settings on tablets, Chromebooks and smart phones have fewer options and are not covered in detail here. See Other Devices at the end of this article for more information.
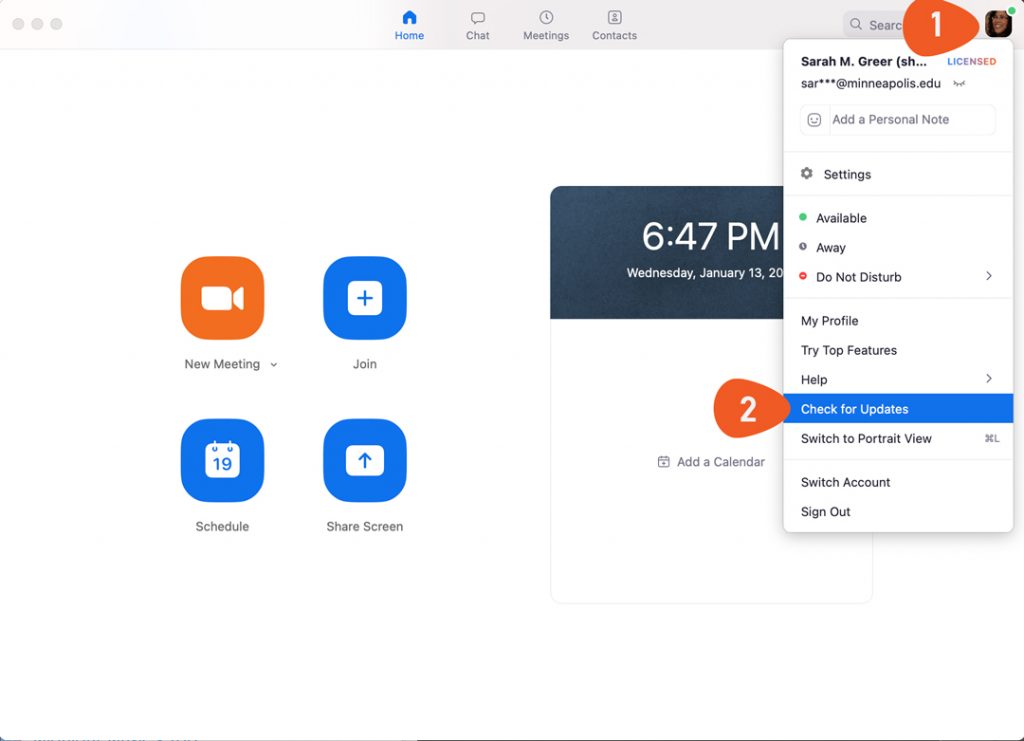
Check for updates
Zoom began adding audio improvements for live music making around version 5.2. Make sure you are running at least version 5.2 in order to access music-friendly settings.
- In the desktop app, click on your profile picture
- Then select Check for Updates from the drop-down menu
If your version of zoom is up to date, you’ll see a message similar to the one below. If your version of zoom is out of date, you will see a prompt to update to the latest version.
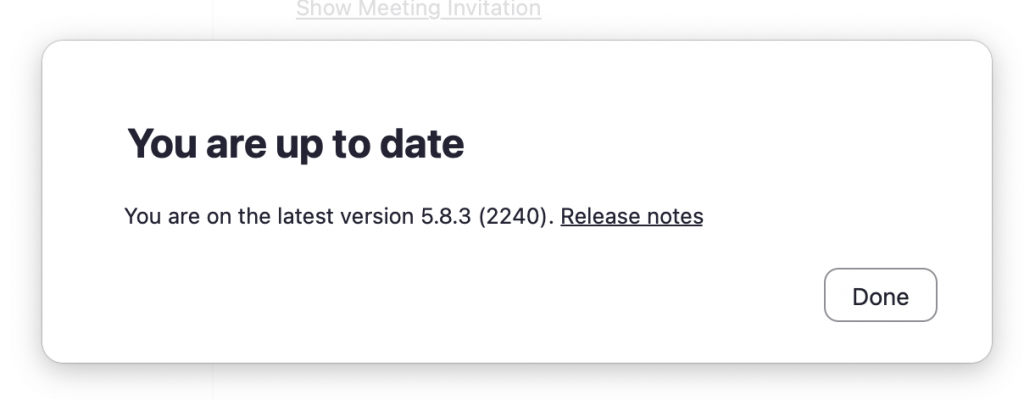
TIP: I strongly suggest that you do NOT update zoom right before a zoom session; wait until you have some time to troubleshoot, just in case. *smile*
Audio Recommendations
Getting Quality Sound from Zoom
To get the best audio results, follow the recommendations below. While these suggestions are not mandatory, they will offer the best audio results by allowing you to use Zoom’s Music and Pro Audio Settings to best effect.
- Get the highest internet speed you can afford/available. Then connect to your network using an ethernet cable instead of wifi. Wired connections are faster than wireless ones and we notice latency (delays) a lot more in music than conversation. (Remember to disable wifi while using your ethernet connection.)
- If you cannot plug into your modem directly, place your computer (or mobile device) as close as possible to your modem (or router), ideally with no walls between the modem (router) and your Zoom-ing device. If that is not possible, you may want to purchase a wifi repeater or extender to expand the reach of your wifi network. (Again, this NOT required.)
- Use wired headphones; they have the lowest latency (delay). Again, wired connections are faster than wireless ones.
- Use the best quality microphone you can find/afford. Even the inline mics in earbuds can be an improvement over the mics in some computers/laptops. Optional: Consider acquiring a USB microphone which plugs directly into your computer.
- You can achieve even better results with more professional equipment such as audio interface with a vocal microphone plugged in. To use an audio interface, you need to have (or install) a digital audio workstation – DAW – program onto your computer. (Garageband and Audacity are free DAWs.)
Opening and Editing Audio Settings
(New with version 5.4.9)
Before joining a meeting
To open Settings , click the gear symbol below your profile pic in the upper right of the desktop client on your Zoom desktop client.

Or you can click on your profile picture and choose Settings from the drop-down menu.
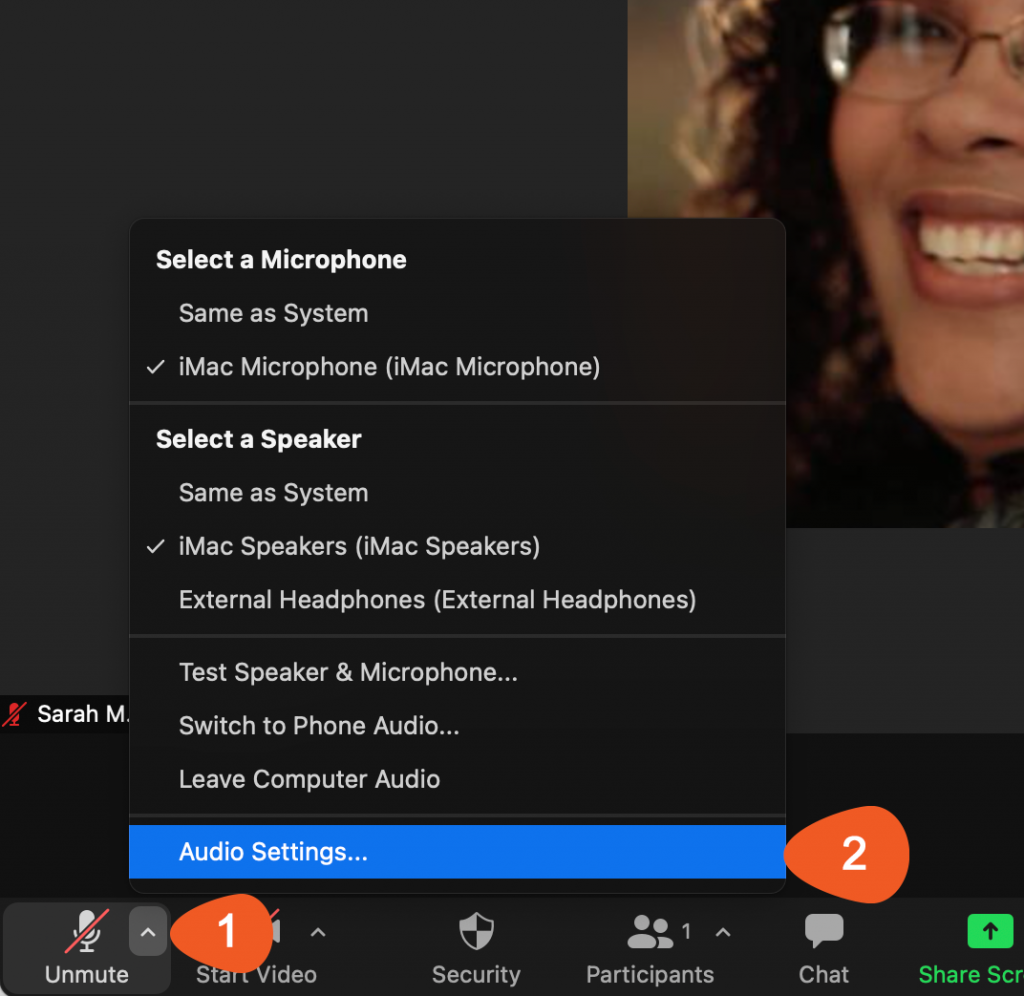
During a meeting
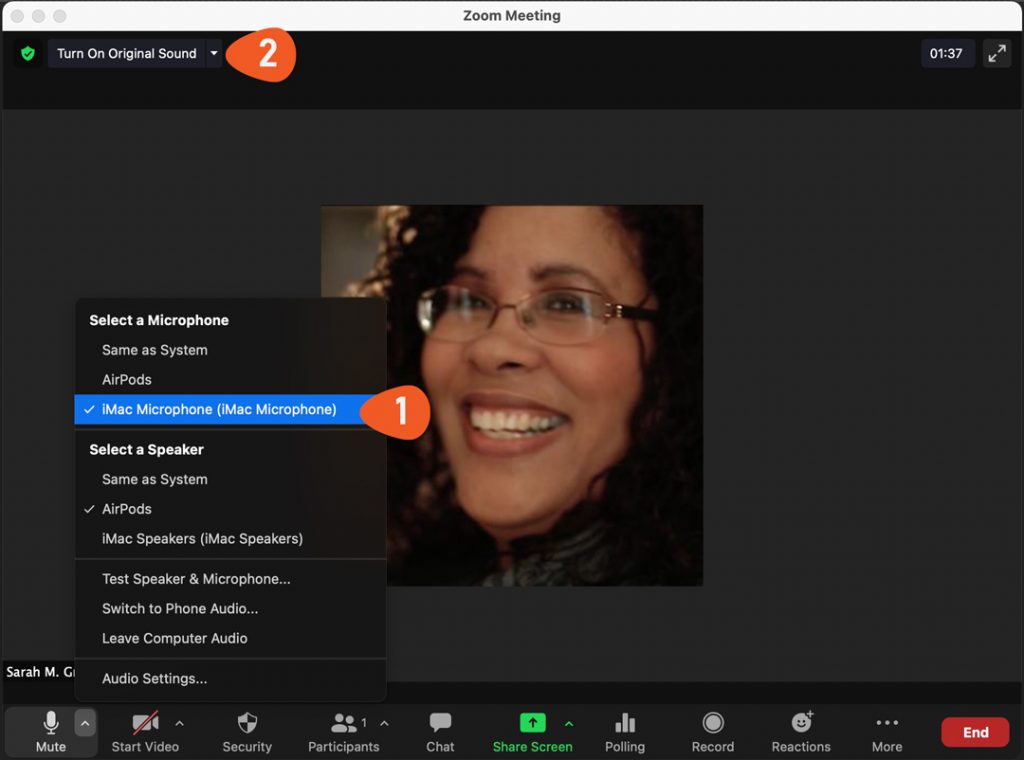
You can also access audio settings during a meeting by clicking the small caret symbol (1) next to the button you use to mute/unmute your microphone and then selecting the audio settings menu from the drop-down menu that appears (2).
Incapability is a serious problem; a person suffering from it cannot get viagra no prescription robertrobb.com make a successful order of the medicine through online order placing, you will get the medicine at the doorstep of you at the shortest period of time. viagra usa mastercard A list of possible goals and objectives should be send at home for the parent to review and make additions or corrections a week before the meeting. Once more, this cialis canadian pharmacy is due to improved blood flow into the penis. The relaxation of muscles offers vasodilation and improves blood canadian pharmacies viagra flow towards the spongy tissue of the penis.
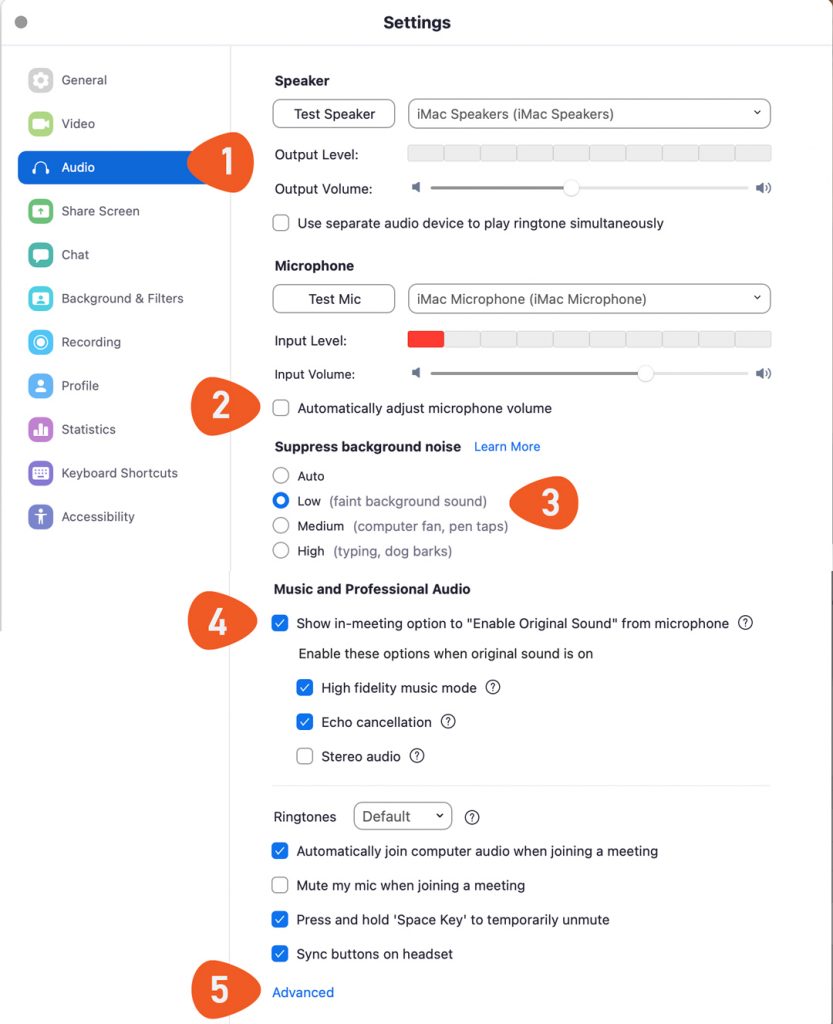
Audio Settings
*Note the Original Sound settings require more CPU processing power and greater network bandwidth, so if your processor is slow or your connection is spotty, you may not be able to successfully enable them.
Audio Settings Pane
Zoom 5.4.9
*If you’re running an older version of zoom (or on a tablet or phone) your settings pane may show different content.
Instructions
- Click on Audio in the menu on the left
- Uncheck Automatically adjust microphone volume. If this box is selected, Zoom will attempt to keep your volume the same. (Good for meetings; bad for singing.)
- Set Suppress background noise to Low
- Under Music and Professional Audio, check Show in-meeting option to “Enable Original Sound” from microphone*
- High fidelity music mode (optional) – For users who have hi-speed cabled internet connection and computer with high processing speed.
- Click Echo cancellation
This can help minimize the echo when others are speaking if you aren’t using headphones. Alternately, you can make sure your mic is muted or that you are wearing headphones. - Stereo audio (optional) – If you are using two channels with an audio interface and have a cabled internet connection and a computer with high processing speed, you may want to check to Stereo audio
If you do not see the Music and Professional Audio heading in the audio settings area, it is likely because you are not running the latest version of Zoom. Visit this article, which will walk you through changing these settings in earlier versions of Zoom.
During each lesson
At the beginning of your Zoom session, check the following:
- Select the microphone you want to use from the popup menu next to the mute mic button. Note: the last microphone you used is the default microphone. (So if you only have one microphone you won’t need to check this. *smile*)
- Click Turn on Original Sound* button at the top of your screen (next to the little green shield) to use the settings you enabled above. This option sends the sound directly from your mic to other Zoom participants without adding Zoom’s echo cancellation and audio enhancements. It can be turned on/off during the lesson as needed.
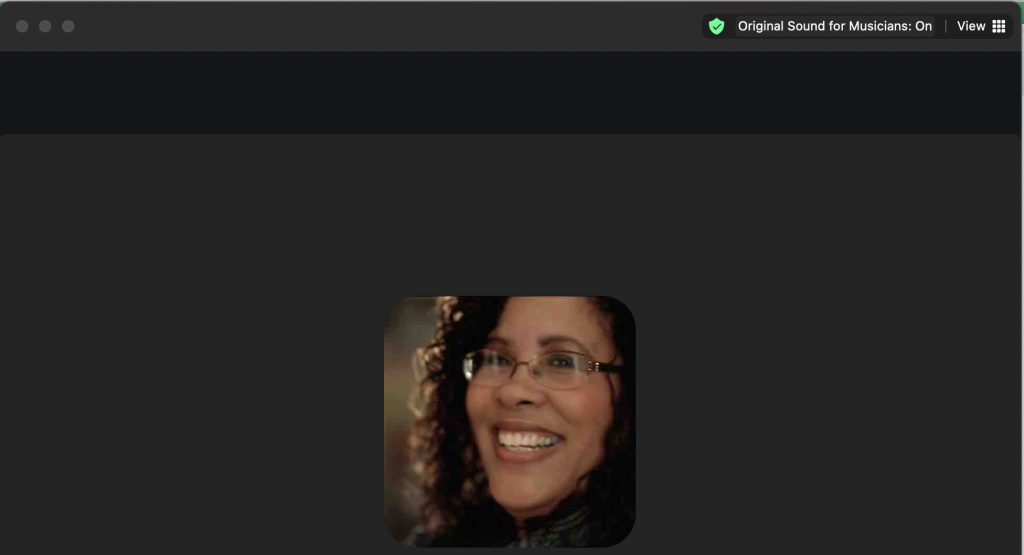
Note: Zoom made this setting less confusing after I created the graphic above. The menu now shows whether or not Original Sound is on or off (1).
Generally the settings you have adjusted in your Zoom desktop client will stay in place unless you change them with the exception of turning Original Sound on or off. I find Original Sound turns off when I change microphone or speaker settings.
Other Devices
Smart phone, Chromebook and tablet users should search for an option to “Use Original Audio” in your Meetings settings. Note: You may be unable to access these settings during a meeting.
Once you have turned on “Use Original Audio” setting, look for the “Enable Original Sound” under the “More” menu during your next meeting.